Git
Brief
git is probably the most important tool of all in your programmer toolbelt! It is a software which is able to handle a giant history of all the changes you ever made to your code. It is very powerful to work with other developers and split your tasks.1
Why bother?
There are a few reasons to use git:
- revert: Go back in time to a working state if you broke something.
- checkout: Check how the project was at a given date.
- commit: Be able to work step-by-step by grouping your changes with a description.
- blame: Be able to know when a line of code was added, and by whom.
- push: Have a copy of your code on a server so that other developers can get it.
- pull: Get changes made by other developers.
Good practices
Small commits
Guideline
As soon as you have made some progress and the code compiles, make a commit!
Try to avoid putting unrelated changes in the same commit: split them over several commits.
Clear messages and descriptions
Guideline
Don't be lazy, write actual sentences without stripping words!
In the description, explain why you are making the change.
Be clear about which part of the code is affected by the changes. I (and others) like to put this inside [ ] at the beginning of the message.
It is great to distinguish different types of commit by starting the message with a keyword:
- Add: adds a new feature / class / function.
- Update: improves / changes an existing feature / class / function.
- Fix: fixes a bug.
- etc.
You can also use 😎 Gitmoji 😎, a standard set of emojis to indicate the kind of commit you are making.
Here are some example messages I would write:
✨ [guess_the_number] Add get_int_from_user()
♻️ [CMake] Modernize set(EXECUTABLE_OUTPUT_PATH ...)
🐛 [hangman] Fix missing include
♻️ [board] Start using BoardSize instead of int
Don't commit broken code
Guideline
Always make sure the code compiles before commiting it!
This can especially happen after a merge or a conflict resolution: so please check that the code is still working before commiting the resolved conflict!
Double check
Guideline
Read all your changes before commiting them! It will make sure you don't commit temporary debug code (as I have done way too many times), and it is a good opportunity to review all your changes and make sure you are happy with them.
It is also a good opportunity to make sure you are not commiting files you are not suposed to, like your build folder.
TIP: Using a graphical interface will greatly help you in that task.
Using a graphical interface
There are a lot of apps that make the steps of the next sections easier to do and monitor. I would recommend GitKraken for the job. It is free to use for public repositories, has a nice interface and a great set of features. They also have a Youtube channel with tons of concise tutorials to get started.
NB: Another great git UI is Fork if you are tired of how laggy GitKraken can sometimes be. (But unfortunately it is not available on Linux).
.gitignore
There are a few files that you don't want to commit to your repository. For example all the build files generated by CMake, or the executable that you built for your machine. To tell git to ignore them you simply have to add a file named .gitignore at the root of your repository and list all the files and folders you want to ignore:
# Build files #
bin/
build/

# User settings #
.vscode/

# OS-generated files #
.DS_Store
.DS_Store?
._*
.Spotlight-V100
.Trashes
ehthumbs.db
Thumbs.db
If you are using something like GitKraken you can also right-click on the file or folder and select Ignore.
How to use git
Overview
info
The steps are presented with the command line so that you get a better understanding of git. Yet we strongly recommend that you use a graphical interface like GitKraken to simplify this for you.
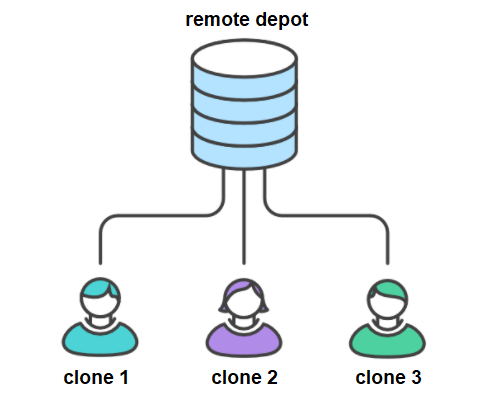
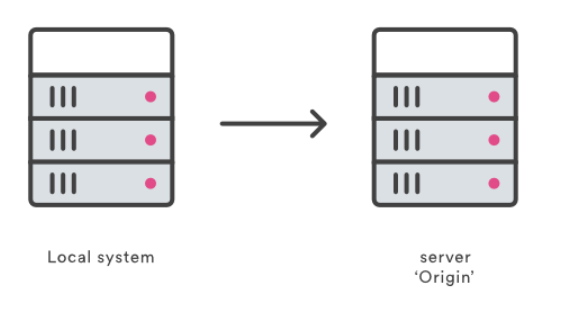
The usual setup when you use git is to create a remote depot that is used as a central authority (often this is GitHub, but many other providers exist like GitLab). Authorized developers clone the content on their computer, make modifications, and push their changes back to the depot so that everyone can get it.
It is also possible to work only locally (which is great for a simple test project or exercises). Simply open a command line and type git init and you can skip the "inital setup" from the next section. It is still possible afterwards to publish your local repository to GitHub though.
Initial setup
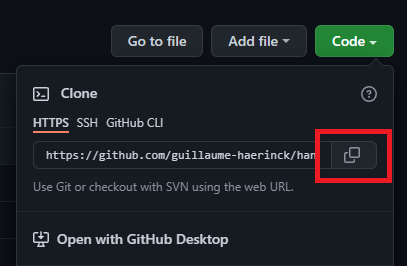
You first need to install git and go through the setup. Then you can go to GitHub, create a new account, and create a new repository (should be a green button on the "Repositories" left panel). Once created, you will be able to clone it on your computer.
To do so, open a command line in the folder you want you repository to be in, and run git clone your_repo_url. Replace "your_repo_url" with the one given by GitHub when you click on the green "Code" button.
Work routine
There are only a handful of commands that are useful on a day-to-day basis. Here is how it works:
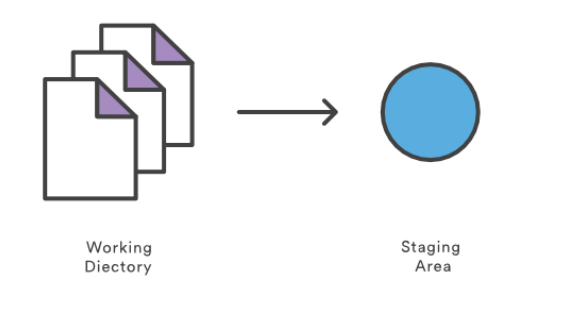
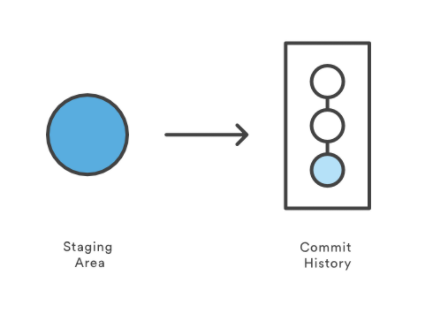
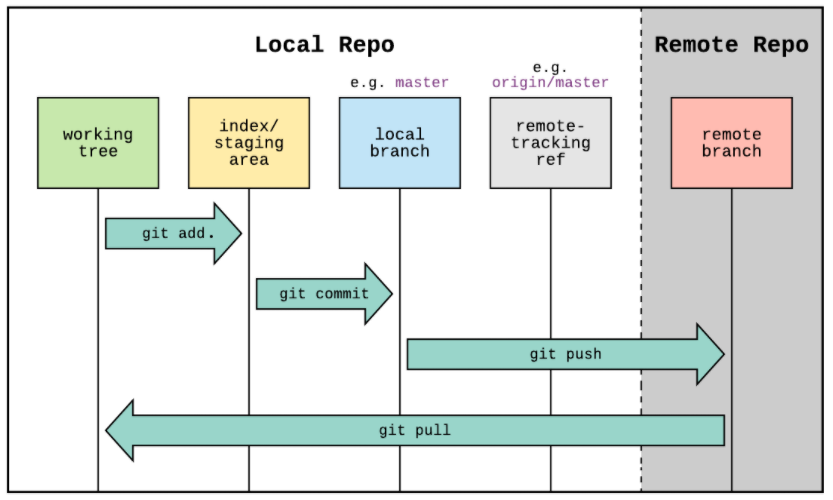
After making some changes, you have to select the files that you want to commit to the remote repo. To select all changed files run git add .
When you are happy with your changes, you can save them in a group that will be stored locally. To do so run git commit -m "Place a description of your changes here".
Then it is time to make you local commit accessible to others via the remote repository. Simply run git push.
In order to get the latest changes from the remote repository it is recommended to frequently run git pull (in particular, always before calling git push). If you work with other developers it is possible that you encounter conflicts if you made changes at the same place in the same files. In this case, check out the section about resolving conflicts.
You might also have heard about branches. This is an advanced git feature, you likely don't need to use it for your first student projects. If you are curious check out the Advanced Git features.
Resolving conflicts
A conflict happens when you made changes in the same place as another developer. In this case you will have to use an external tool to compare the changes and merge them into a valid file.
GitKraken is a great tool to handle these situations: check out this tutorial to get started.
Going further
TODO Link to Advanced git features
- NB: There are many other software versioning solutions out there, but git is by far the most popular one.↩